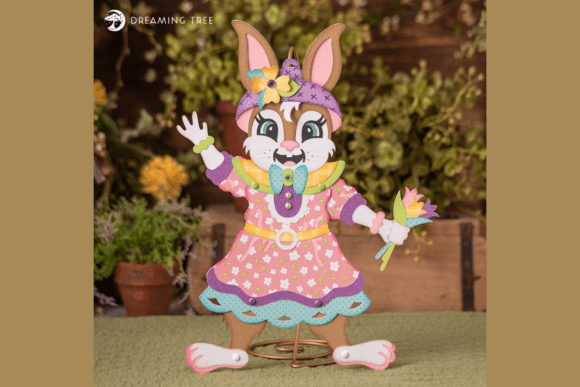
Jointed Mrs. Easter Bunny SVG
The transition from digital design to physical craft often involves a significant leap in complexity, particularly when working with articulated paper models. The Jointed Mrs. Easter Bunny SVG addresses this gap by providing a structured, dimensionally aware template that transforms static vector lines into a three-dimensional object. For professionals and hobbyists alike, this asset is not merely a decorative image; it is a technical blueprint for assembly. It requires a shift in mindset from simple cutting to strategic layering, color mapping, and mechanical joining.
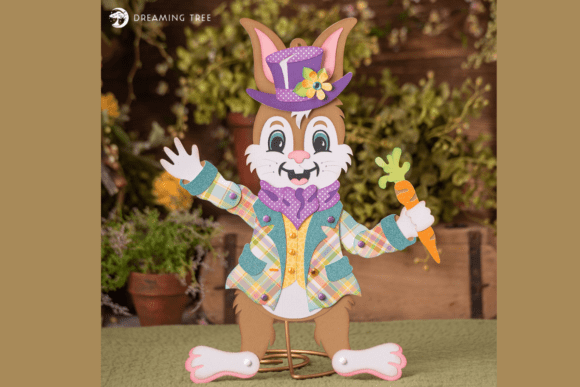
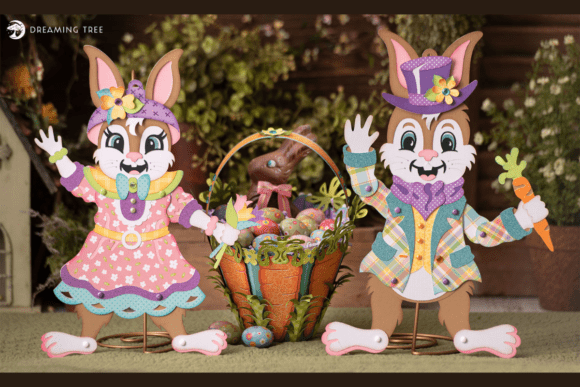
This design features articulated limbs and layered details, bringing playful movement and dimension to spring décor or crafty embellishments. Unlike flat decals or single-layer cutouts, this project demands an understanding of how individual components interact. You are essentially building a small machine out of cardstock, where hinges (mini brads) allow for motion and structural integrity. The result is a charming figure that stands at 14.5 inches high, offering a substantial presence on any desk, shelf, or seasonal display.
Technical Specifications and Compatibility
Before initiating the workflow, it is crucial to understand the technical parameters of the file. The design is provided in SVG format only, ensuring scalability without loss of resolution. This is compatible with all major SVG-ready cutting machines (such as Cricut or Silhouette) and software platforms. The file is optimized for standard 12×12 inch cutting mats, which streamlines the preparation phase for users who frequently work within these dimensions.
One of the most valuable aspects of this asset is the inclusion of a handy PDF legend. In complex multi-piece designs, identifying which layer corresponds to which part can be a source of error. The legend acts as a quality control document, helping you easily identify pieces and pick your paper colors before a single blade touches the material. This pre-planning step significantly reduces waste and rework, allowing for a smoother execution phase.
While the design is optimized for 12×12 mats, the SVG nature allows for resizing. However, users must note that the final size may vary slightly depending on the scaling factor applied. If precision is critical for fitting the bunny into a specific frame or space, it is advisable to test-cut a single joint on scrap paper before committing to the full production run. This iterative testing ensures that the scale matches your spatial requirements.
Material Preparation and Supply Chain
Successful implementation of the Jointed Mrs. Easter Bunny SVG relies heavily on material selection. The visual impact of the articulated design depends on contrast and texture. The recommended supply list suggests a curated palette of cardstocks and patterned papers that create visual depth. Using the correct weight and finish of paper is essential for the durability of the joints.
- Base Structures: The primary body parts are suggested to be cut from 12x12 Peony Cardstock and White Cardstock. These provide a neutral yet elegant backdrop for the colorful accents.
- Detail Layers: Black, Caramel, and Keylime cardstocks (8.5x11 sheets) are specified for finer details. The use of smaller sheet sizes here indicates that these elements are likely intricate overlays or internal mechanisms that do not require full-sheet dimensions.
- Patterned Accents: To add thematic flair, the design incorporates several patterned papers. These include "Spring Buds" (Pink), "Sweet Spooky" (Purple), "Petite Prints" (Turquoise), "Welcome Easter" (Yellow), and glitter variations in Purple and Turquoise. The mix of matte cardstock and glitter paper creates a tactile contrast that enhances the visual appeal.
- Adhesives and Hardware: Foam adhesive squares are critical for creating depth between layers, preventing the model from looking flat. Mini brads (5-6mm) serve as the pivot points for the limbs, while gold string may be used for hanging or decorative tying. Standard supplies like ink, rhinestones, faux pearls, acrylic paints, pencil, glue, and eraser complete the toolkit.
All cardstock featured is specified as Encore Cardstock, 80 lb cover (216 gsm). This weight is substantial enough to hold its shape but flexible enough to bend at the joints without tearing. Using lighter-weight paper might result in sagging limbs, while heavier stock could make the brad holes difficult to punch cleanly. Consistency in material weight across all layers is vital for a balanced final product.
Workflow Integration and Assembly Strategy
Integrating this SVG into your creative workflow involves more than just loading the file into a cutter. It requires a systematic approach to organization and assembly. The process can be broken down into distinct phases: preparation, cutting, sorting, and construction.
Phase 1: Digital Preparation
Begin by opening the SVG in your preferred design software. Use the included PDF legend to map out your color scheme. Assign each piece of the legend to a specific sheet of cardstock. This digital mapping prevents confusion during the physical cutting stage. Ensure that your cutting mat settings match the thickness of your chosen 80 lb cardstock. A dull blade will struggle with multiple layers or thick cardstock, leading to jagged edges that compromise the aesthetic.
Phase 2: Cutting and Sorting
Once the pieces are cut, the immediate next step is sorting. Do not attempt to assemble immediately. Instead, group the pieces by their function: base layers, detail layers, and limb segments. Laying them out in the order of assembly helps visualize the final structure. This step mirrors inventory management in business workflows—having all components accounted for before starting the build minimizes bottlenecks later.
Phase 3: Layering and Adhesion
The core of the design’s elegance lies in its layered details. Apply foam adhesive squares to the back of specific detail pieces before adhering them to the base layers. This technique adds physical dimension, making the bunny appear more lifelike. Pay attention to the alignment; misaligned layers can throw off the symmetry of the face or ears. Use a bone folder or similar tool to ensure strong adhesion without damaging the delicate paper edges.
Phase 4: Articulation and Final Assembly
This is the most technically demanding phase. The articulated limbs require precise placement of mini brads. Punch holes at the designated joint locations using a sharp awl or hole punch. Insert the brads through the aligned layers of the arm or leg, then fold the prongs securely on the back. Test the range of motion after each joint is secured. If a limb is too stiff, gently widen the hole; if it is too loose, tighten the brad or add a small washer (or folded paper) for stability.
The included step-by-step video tutorial is an invaluable resource during this phase. Video tutorials provide dynamic visual cues that static images cannot, such as the angle at which to insert a brad or the tension required for a secure fit. Watching the assembly process beforehand can preemptively solve potential issues, saving time and frustration.
Quality Control and Long-Term Use
After assembly, conduct a final quality check. Inspect all glued surfaces for excess adhesive seepage, which can be cleaned with a damp cloth or corrected with a precise trim. Ensure that all rhinestones, pearls, and painted details are firmly attached. Check the mobility of all joints one last time to ensure smooth movement.
The finished Jointed Mrs. Easter Bunny is not just a seasonal decoration; it is a durable craft item. With proper care, the articulated parts can be adjusted repeatedly without degradation. This makes it suitable for educational settings, where children can learn about mechanics and assembly, or for professional portfolios showcasing advanced papercraft skills. Its elegant design allows it to fit seamlessly into modern home décor, bridging the gap between festive fun and sophisticated style.
By treating the Jointed Mrs. Easter Bunny SVG as a comprehensive project plan rather than a simple download, creators can achieve professional-grade results. The combination of clear instructions, compatible digital formats, and thoughtful material recommendations ensures that the outcome matches the intent. Whether used for personal enjoyment, gift-giving, or commercial sale, this design offers a robust framework for creating a standout Easter decoration.