The Ultimate Guide to Flat Creation Box Templates for Crafters and Small Businesses
In the vibrant world of handmade goods, presentation is just as important as the product itself. Whether you are a seasoned scrapbooker, an independent artist selling prints, or a small business owner shipping delicate items, the way your customer receives your package can make or break their first impression. This is where Flat Creation Box Templates come into play—a simple yet powerful tool that transforms ordinary mailers into elegant, protective, and professional packaging solutions.
If you have ever struggled with bending cards during transit, scratching artwork, or finding boxes that fit slim items perfectly, this guide is for you. We will explore what flat creation box templates are, why they are essential for modern crafting businesses, how to use them with popular cutting machines like Cricut and Silhouette, and how to maximize their potential for both personal projects and commercial ventures.
What Are Flat Creation Box Templates?
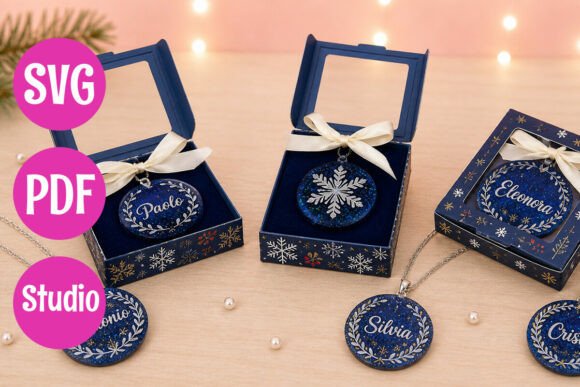
At their core, flat creation box templates are digital files designed to be cut out and assembled into sturdy, flat-bottomed boxes. Unlike traditional shipping boxes that require tape and glue, these templates often feature interlocking tabs and precise fold lines, allowing for quick assembly without adhesives in many cases. They are specifically engineered to hold flat items—such as greeting cards, art prints, stickers, frames, and scrapbook layouts—providing rigid protection against bending, creasing, and impact.
These templates are not physical products; they are digital downloads. When you purchase a set, you receive a ZIP archive containing various file formats tailored to different needs:
- SVG Files: Vector graphics optimized for cutting machines like Cricut Design Space and Silhouette Studio. These allow for precision cutting of cardstock, foam board, or corrugated plastic.
- PDF Files: High-resolution documents intended for printing on standard home printers. This option is perfect for those who do not own a cutting machine but still want professional-looking boxes.
- Studio Files: Native files for Silhouette users, ensuring that all layers, cuts, and scores are ready to go without conversion errors.
Why Choose Flat Boxes for Your Creations?
You might wonder why you shouldn’t just use standard poly mailers or padded envelopes. While those options are cheap and lightweight, they offer little structural integrity. A flat creation box provides several distinct advantages that elevate your brand and protect your inventory.
Superior Protection for Delicate Items
Cards, prints, and framed photos are notoriously fragile. They can easily warp in humid conditions or crack under pressure. A custom-fit flat box acts as a shield, distributing weight evenly and preventing direct contact with rough surfaces. For artists selling original prints, this level of care signals professionalism and respect for the artwork.
Enhanced Unboxing Experience
In the age of social media, the "unboxing" moment is a marketing opportunity. Receiving a beautifully crafted box feels like receiving a gift. It creates a memorable tactile experience that encourages customers to share photos online. A plain envelope disappears; a sturdy, well-designed box becomes part of the product’s story.
Customization and Branding
Because you create the boxes yourself using templates, you have full control over the dimensions, material, and finish. You can choose heavy-duty cardstock for luxury items or recycled kraft paper for an eco-friendly aesthetic. You can even add decorative elements before assembly, such as embossing, stamping, or wrapping the exterior with patterned paper.
How to Use Flat Creation Box Templates
Using these templates is straightforward, but it requires a bit of preparation to ensure the best results. Here is a step-by-step overview of the process.
Step 1: Select the Right Material
The success of your box depends largely on the paper or board you choose. For most flat creations, cardstock (between 110lb and 130lb) offers a good balance of flexibility and rigidity. For heavier items like thick prints or small frames, consider using corrugated cardboard or foam board. Foam board is particularly useful because it is lightweight yet incredibly strong, making it ideal for shipping.
Step 2: Prepare Your Software
If you are using a cutting machine, import the SVG or Studio file into your respective software (Cricut Design Space or Silhouette Studio). Ensure that the design is scaled correctly. Most templates are provided at actual size (1:1 scale), so check your settings before sending the file to the cutter. If you are printing a PDF, ensure your printer settings are set to "Actual Size" or "100% Scale" to avoid distortion.
Step 3: Cut and Score
Run your chosen material through the cutting machine. Pay attention to the difference between cut lines (which go all the way through the material) and score lines (which create indentations for clean folding). If your machine does not support scoring, you can use a bone folder or the back of a butter knife to manually score along the indicated lines after cutting.
Step 4: Assemble
Fold along all score lines. The beauty of these templates lies in their engineering; most will slot together securely. Apply a small amount of double-sided tape or glue to the designated tabs if extra security is needed, though many designs are self-locking. Once assembled, your box is ready to receive your product.
Common Misconceptions About DIY Packaging
There are a few myths surrounding homemade packaging that often deter beginners from trying it.
Misconception 1: It Takes Too Much Time.
While assembling one box takes time, creating a batch of templates allows you to produce dozens of boxes quickly. Once you have the template set up, the repetitive nature of cutting and folding becomes meditative and efficient. Many crafters find that making their own packaging is actually faster than sourcing and waiting for wholesale supplies.
Misconception 2: It Requires Expensive Equipment.
You do not need industrial machinery. A basic Cricut Explore or Maker, or a Silhouette Cameo, is sufficient for hobbyists. Even if you don’t own a cutter, the PDF options mean you only need a good quality inkjet or laser printer and scissors. The initial investment is minimal compared to the cost of buying pre-made custom boxes in bulk.
Misconception 3: Homemade Boxes Look Amateurish.
On the contrary, when done correctly, DIY boxes look more bespoke and thoughtful than mass-produced alternatives. The slight variations in handmade materials can add charm and authenticity to your brand identity.
Ideal Use Cases for Flat Creation Boxes
While versatile, these boxes shine brightest in specific scenarios. Here are some common applications:
- Greeting Cards and Invitations: Protect intricate die-cuts and foil stamping from damage during mailing.
- Art Prints and Postcards: Provide a rigid sleeve that prevents curling, especially in humid climates.
- Sticker Sheets and Decals: Keep sticky edges protected and prevent shifting within the package.
- Scrapbook Pages and Layouts: Large format flat boxes are perfect for protecting full-page designs.
- Digital Product Packaging: Include a QR code inside the box that links to digital resources, blending physical and digital experiences.
Conclusion: Elevate Your Craft with Professional Packaging
Investing in Flat Creation Box Templates is more than just a logistical decision; it is a creative one. It allows you to extend the artistry of your work into the packaging itself. By providing sturdy, elegant, and custom-fit boxes, you demonstrate care for your customers and pride in your craftsmanship. Whether you are using Cricut, Silhouette, or simply a printer and scissors, these templates offer a flexible, affordable, and professional solution for anyone looking to take their handmade business to the next level.
Remember, the goal is not just to ship a product, but to deliver an experience. With the right tools and templates, you can turn every order into a memorable unboxing event that keeps customers coming back for more.