A Haunting We Go SVG Bundle
Halloween crafting is often associated with last-minute panic runs to craft stores or settling for generic, store-bought decorations that lack personal flair. However, for those who enjoy the tactile satisfaction of creating something unique, digital cut files offer a sophisticated middle ground between mass production and total hand-crafting from scratch. The A Haunting We Go SVG Bundle stands out in this crowded market not just for its spooky aesthetic, but for its structural complexity. It is a 3-in-1 digital collection designed for serious crafters who want to create dimensional, interactive displays rather than flat decals.
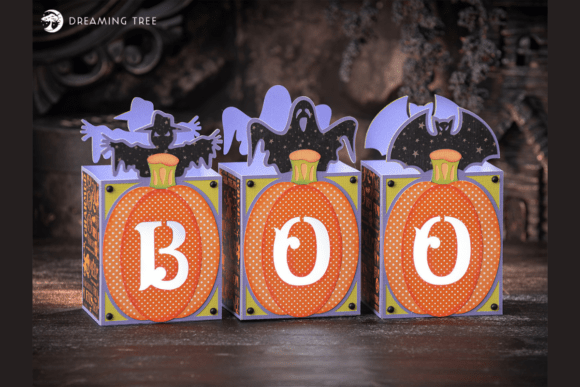
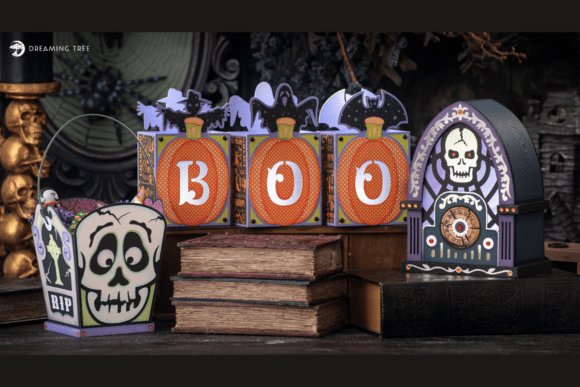
This bundle includes three distinct projects: the Boo Luminary, the Haunted Radio, and the RIP Treat Basket. While the premise sounds simple, the execution requires precision. Many beginners dive into complex SVG bundles without understanding the specific requirements of layered paper engineering, leading to frustration and wasted materials. This guide breaks down exactly what you are getting, how to prepare your workspace, and the critical details you must check before you hit "cut."
Understanding the Scope of the Collection
The term "SVG Bundle" can be misleading if you assume it comes as a ready-to-assemble kit. It does not. You are purchasing a digital file set—specifically in SVG format—that dictates the shapes you will cut from cardstock. The bundle is designed for machines that accept 12″ × 12″ sheets, which is standard for most electronic cutting devices like Cricut or Silhouette. However, because these are 3D structures, resizing them arbitrarily on your machine’s software can cause alignment issues. The dimensions provided by the designer are calculated based on the original file size, so it is best to cut at 100% scale to ensure the tabs and slots fit together correctly.
The collection features:
- Boo Luminary: A glowing centerpiece that uses light to reveal hidden details.
- Haunted Radio: A vintage-style radio structure that likely incorporates moving parts or layered depth.
- RIP Treat Basket: A functional container for Halloween candy, designed with thematic typography and structure.
Each piece is accompanied by a PDF legend. Do not skip this document. It serves as your map, identifying which layer corresponds to which color of cardstock and providing a visual guide for assembly. Without this legend, you may find yourself gluing layers in the wrong order, resulting in a project that looks disjointed or fails to stand up.
Material Selection: Where Most Crafters Fail
The success of any papercraft project hinges on the weight and stiffness of the paper used. A common mistake is using lightweight printer paper or thin scrapbook paper for structural elements. If you attempt to build the Boo Luminary or the Haunted Radio with flimsy material, the final product will sag, warp, or collapse under its own weight. The recommended supply list specifies 80 lb cover cardstock (216 gsm). This weight provides the necessary rigidity to hold the 3D shape while remaining flexible enough to score and fold cleanly.
The design calls for a specific color palette to achieve the intended visual impact. For the Boo Luminary, for instance, you need nine sheets of Pansy cardstock, three of Limeade, two of Cantaloupe, and two sheets of Light Orange Pattern Paper. The pattern papers add texture and visual interest, preventing the luminary from looking like a plain box. Using solid colors where patterns are required will result in a flat, less engaging finish. Conversely, using too many busy patterns can clutter the design. Stick to the suggested distribution: use patterned papers for accent layers and solid colors for structural bases.
Additionally, the inclusion of white vellum paper is crucial for the luminary aspect. Vellum diffuses light beautifully, creating a soft, eerie glow when a flameless tealight is placed inside. If you substitute vellum with opaque paper, you lose the primary feature of the luminary. If you use overly thin tissue paper, it may tear during assembly. The specified 8.5×11 white vellum sheets strike the right balance between translucency and durability.
Assembly Realities and Technical Pitfalls
Even with the correct materials, assembly errors are frequent. One overlooked detail is the need for precise adhesive application. Glue splatters on dark cardstock or intricate cutouts can ruin the clean lines of your design. Use a fine-tip applicator or a glue pen for small tabs. Furthermore, allow each glued section to dry slightly before proceeding to the next step. Rushing the drying process can cause layers to shift, misaligning the entire structure.
Another potential issue is the handling of delicate cutouts. When you remove the cut pieces from your mat, they may stick together or tear if pulled aggressively. Use a weeding tool to gently lift edges, especially for the smaller text elements in the "RIP" basket or the details on the Haunted Radio. Patience here saves hours of re-cutting.
For those intimidated by the multi-step nature of these projects, video tutorials are available for each item. These are not optional extras; they are essential guides. They demonstrate the sequence of folding and gluing that static images cannot convey. Watch the tutorial for the Boo Luminary before you make your first cut. Understanding the final form helps you anticipate how each layer contributes to the whole. For example, knowing that the innermost layer holds the candle allows you to prioritize its stability over decorative outer layers.
Evaluating Value and Suitability
Before purchasing, consider your skill level. This bundle is ideal for hobbyists and creators who have some experience with paper engineering. If you are a complete beginner to 3D papercraft, you might find the simultaneous cutting and assembly of three different projects overwhelming. In that case, start with a simpler single-layer design to understand how SVG files translate into physical objects.
However, for entrepreneurs selling handmade Halloween decor, this bundle offers high value. The finished products are substantial, visually striking, and command a higher price point than simple ornaments. The combination of functional items (the treat basket) and decorative ones (the luminary) gives you a versatile inventory. Ensure you have enough time to assemble these carefully; cutting is fast, but assembly is methodical.
Finally, verify your machine’s capabilities. While the files are standard SVGs, ensure your blade is sharp and your mat is sticky. Dull blades can crush the edges of thick cardstock, making assembly difficult. Clean your rollers regularly to prevent dust from interfering with the feed mechanism. By respecting the technical requirements of the medium, you transform a digital download into a tangible, hauntingly beautiful piece of art. The A Haunting We Go SVG Bundle rewards careful preparation with impressive results, turning your Halloween crafting from a chore into a creative triumph.